You might be wondering why I even bothered with the hassle of trying to re-dye the leather but it's because I truly love this wallet. I've tried to find others that compare over the years and none have even come close. Even Bimba & Lola don't sell this style anymore. I love the "box clutch" way it opens and closes and the numerous pockets and zips and card holders are indispensable for me. It even doubles as a clutch when I just want to run to the shops. Compromise was simply not an option.
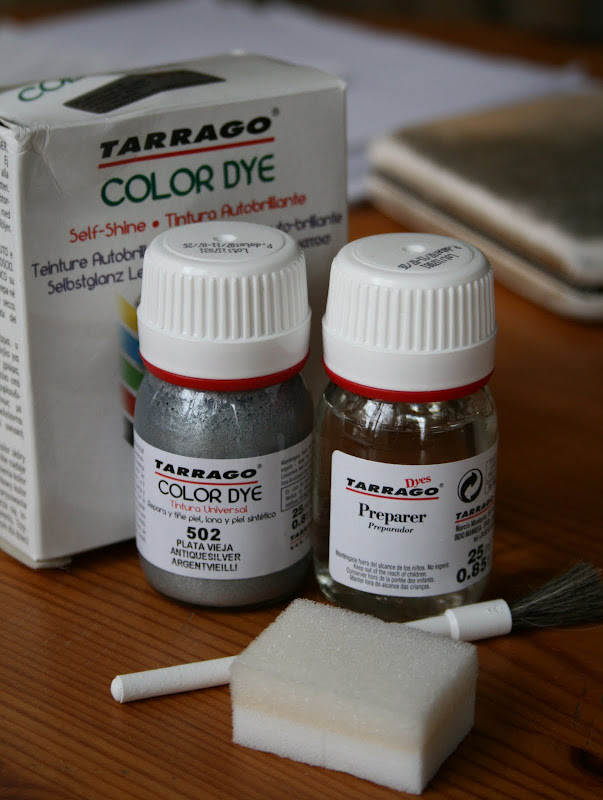
So I set about trying to find out how to dye the leather. There are so many different products out there but I didn't want to spend a fortune or pay to get it professionally done because then I might as well just have bought a new one. I found a few forums explaining how to do it, success (and failure!) stories and helpful tips and ended up buying a leather dyeing kit by Tarrago (£7.50-ish) which promises to keep the leather supple, be colour-fast and even dye white on black.
My wallet used to be an interesting metallic mix of gold and silver and I tried to find this colour again but no such luck. Next time though I might consider mixing my own. I considered nude but since I wasn't familiar with the process, decided to play it safe and so I went with Antique Silver which is the best match to the original colour I could find.
The kit comes with a leather preparer liquid, small sponge and paint brush. TIP ALERT: The sponge and paintbrush they supply are really pants (hairs coming out all the time, fairly hard sponge texture) so I would recommend either using a good quality make-up brush or paint brush and a softer, bath sponge cut to size. These would have made the process much easier to get an even finish. Also, the instructions recommend to do two to three coats but since I was starting from scratch, I found I had to do five - and there was still dye left in the pot.
Rather than ramble on, I'll explain the process step-by-step with photos:
BEFORE
THE KIT

First I taped up all the hardware to avoid smudges. After preparing the surface (dipping an old dish scourer into the preparer liquid and wiping over the surface to remove any dirt/finish), I applied the first layer of dye. It advises to use the brush for edges, near hardware and in small crevices, which I did but found that the brush left a thicker layer than the sponge so had to compensate for that in later stages. Then with a small amount on the sponge, used circular motions to "buff" the colour on.
SECOND LAYER
THIRD LAYER

This is where I felt the dye really starting to show up. The initial two layers didn't make much of an impact but from here you can see a major difference from layer to layer.
FOURTH LAYER

By this point the leather was pretty much done, but there were just a few little places that needed evening out, which I did using the sponge. I found the sponge overall easier to use and I had more control over the amount put on because it adds only a thin layer each time. The brush is a little heavier handed.
FIFTH LAYER - FINAL RESULT
The instructions said to leave it for five hours to dry. I left it over night but if your layers are thin and you leave them to dry completely between stages, it doesn't actually take more than half an hour which is great for impatient people like me.
I'm pretty pleased with it overall. The finish is smooth and still leaves the leather supple and soft. So far there has been no rub off so I'm impressed with the Tarrago kit and would definitely use it again.
Now, what else can I dye??


turned out really nice =)
ReplyDeleteLeather colorant kits can be used to restore worn patches, large areas of co lour loss or even to change the co lour of your leather.
ReplyDeleteFor more information kindly visit:- Leather Colorant Kit